Een enkel item exporteren
Hoewel je gegevenslevering via Form Connectors kunt automatiseren, kun je records ook handmatig rechtstreeks vanaf het platform exporteren.
Er zijn twee manieren om dit te doen, afhankelijk van jouw behoeften: Single Entry Export (voor gedetailleerde, sjabloongebaseerde PDF’s/Documenten) en Bulk Export (voor ruwe gegevens of massadocumentgeneratie).
Eén invoer exporteren
Gebruik de Feed View wanneer je een specifiek record met een aangepaste layout of een Generic PDF wilt exporteren.
Hoe te exporteren
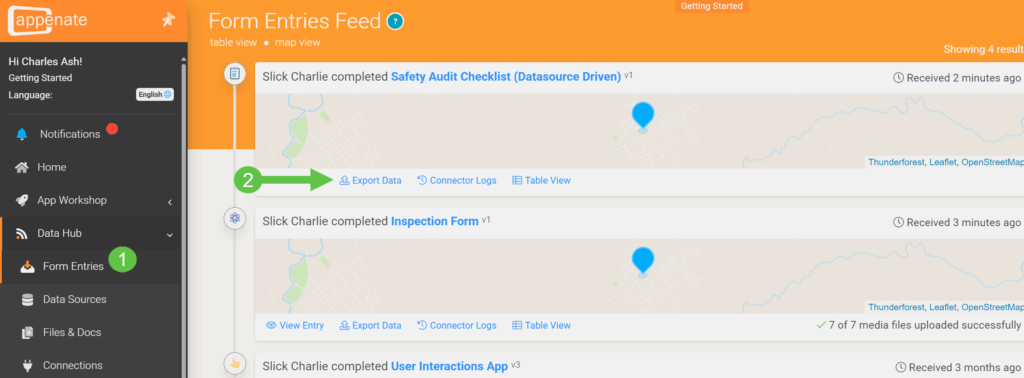
- Ga naar Data Entries > Feed View.
- Zoek het specifieke record (gebruik filters indien nodig).
- Klik op Export Data om het optiesmenu te openen.
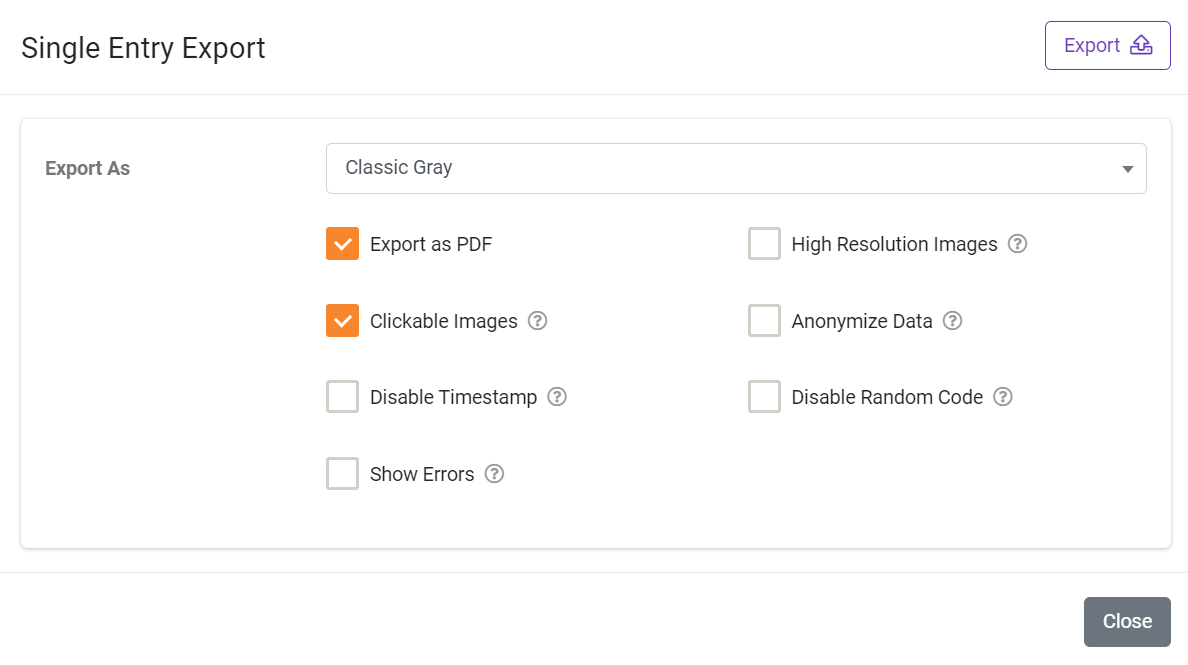
Configuratieopties
| Optie | Beschrijving |
| Export As | Kies tussen de Generic PDF of een aangepaste Word/Excel sjabloon. |
| Export as PDF | Als je een Word/Excel sjabloon gebruikt, zet dit aan om de uiteindelijke uitvoer naar PDF te converteren. |
| Clickable Images | Maakt afbeeldingen in het bestand klikbare links. Opmerking: links tonen het domein van het platform. |
| High-Resolution | Verhoogt de resolutie van 96ppi naar 150ppi. Het beste voor afdrukken, maar resulteert in grotere bestanden. |
| Anonymize Data | Maskeert velden die in de Form Designer als “Personal Data” zijn gemarkeerd voor privacy. |
| Disable Timestamp/Code | Voorkomt dat het systeem yyyyMMdd of willekeurige tekenreeksen aan je bestandsnaam toevoegt. |
| Show Errors | Diagnostisch hulpmiddel: Markeert syntaxfouten in formules in je sjabloon. |
Zodra je op Export klikt, wacht op de meldingspop-up om je bestand te downloaden. Als je het mist, kun je je bestand altijd vinden onder het tabblad Notifications in het zijmenu.
Meerdere invoeren exporteren (Bulk)
Gebruik de Table View om grote datasets voor analyse te exporteren of om documenten voor meerdere invoeren tegelijk te genereren.
Hoe te exporteren
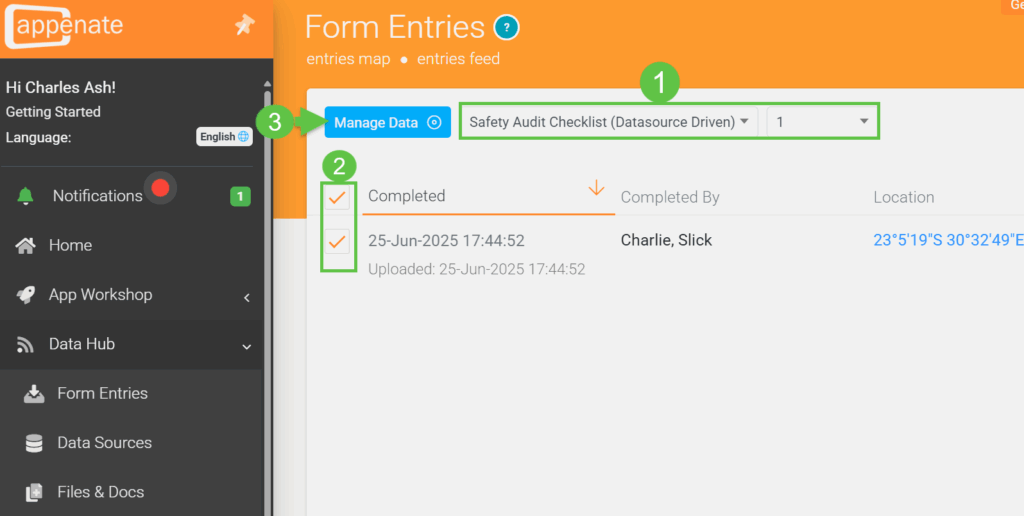
- Ga naar Data Entries > Table View.
- Selecteer je Form en Form Version uit de vervolgkeuzes.
- Vink de vakjes aan voor de afzonderlijke records die je nodig hebt, of selecteer alles.
- Klik op de knop Manage Data.
Beschikbare formaten
- CSV / CSV + Media: Het beste voor gegevensanalyse in Excel of Google Sheets. De optie “Media” bevat een ZIP met alle geüploade foto’s/bestanden.
- Bulk PDF: Genereert een PDF voor elk geselecteerd record met behulp van de Generic of aangepaste sjabloon.
- Bulk MS Word / Excel: Alleen beschikbaar als er al een sjabloon aan het formulier is gekoppeld.
- Trash: Verplaatst alle geselecteerde records naar de account Trash.
Privacy & Opmaak
- Anonymize Data: Redigeert “Personal Data” velden in alle geselecteerde records.
- Clickable Images: Stelt webbrowsers in staat afbeeldingen in bulkbestanden te bekijken.

Naamgevingsconventie voor bulkexports
Wanneer je een Bulk CSV + Media export uitvoert, worden mediabestanden automatisch hernoemd om te zorgen dat ze correct aan jouw gegevens worden gekoppeld. Elk bestandsnaam wordt voorafgegaan door de EntryRowID, die overeenkomt met de waarde in de eerste kolom van jouw gegenereerde CSV.
Bestandsnaamindeling: {EntryRowID} - {EntryId}{Filename}.{ext}
Pro Tip
Het gebruik van de EntryRowID als voorvoegsel stelt je in staat om je mediabestanden eenvoudig te verwijzen en te sorteren naast jouw spreadsheetgegevens.
Antwoord niet gevonden?
Staat jouw vraag er niet bij? Neem dan direct contact met ons op.
Contact opnemen